How to Properly Disassemble a Hot Runner System
Maintaining the efficiency and longevity of hot runner systems in plastic injection molding requires meticulous disassembly procedures. Proper hot runner disassembly ensures effective cleaning, accurate inspection, and precise refurbishment, all of which are vital for optimal performance. This guide outlines a detailed, step-by-step approach to disassembling a hot runner system, emphasizing best practices and safety considerations.
Contact +1 (908) 281-0055 or [email protected] to discuss your Hot Runner Systems today! The experts in Hot Runner Repair, Refurbishment, and Maintenance.
Step 1: Preparation and Safety Measures
Before initiating the disassembly process:
Review Documentation: Consult the manufacturer’s manuals and schematics to understand the specific configuration and components of your hot runner system.
Assemble Tools and Equipment: Gather necessary tools such as torque wrenches, ohmmeters, wooden spacer blocks, rubber caps, and personal protective equipment (PPE) including gloves and safety glasses.
Ensure a Clean Workspace: Set up a clean, organized area to prevent contamination and facilitate efficient workflow.
Power Down and Lockout/Tagout (LOTO): Shut off all electrical and hydraulic power sources. Implement LOTO procedures to ensure the system remains de-energized during disassembly.
Step 2: Electrical Component Assessment
Test Heaters and Thermocouples: Using an ohmmeter, measure the resistance of each heater and thermocouple to identify any deviations from standard values, which may indicate potential failures.
Document Readings: Record all measurements for comparison during reassembly and future maintenance.
Map Connections: Trace and document the wiring of heaters and thermocouples to their respective connectors, ensuring accurate reassembly.
Step 3: Removal of the Cavity Plate
Access Nozzle Tips: In systems without valve pins (fixed gate systems), remove the “A” cavity plate to expose the nozzle tips.
Measure Nozzle Protrusion: Record the distance from each nozzle tip to the nozzle plate. This measurement is critical for maintaining proper gate vestige and ensuring correct nozzle positioning during reassembly.
Step 4: Manifold Separation
Support the Manifold: Utilize wooden spacer blocks to support the manifold’s weight and prevent damage to protruding nozzles.
Disconnect Electrical Components: Carefully detach all electrical connections, labeling them for accurate reassembly.
Unbolt the Manifold: Following the manufacturer’s recommended sequence, loosen and remove the bolts securing the manifold.
Detach the Manifold: Gently lift the manifold away from the nozzle plate. If resistance is encountered, apply even force to avoid damaging components. In some cases, heating the manifold slightly can facilitate separation by softening residual plastic.
Step 5: Nozzle Extraction
Assess Nozzle Attachment: Determine if nozzles are press-fitted or bolted.
Remove Nozzles: For bolted nozzles, carefully unfasten them. For press-fitted nozzles, apply uniform pressure to extract them without causing deformation.
Protect Nozzle Tips: Use rubber caps or similar protective covers to safeguard nozzle tips from damage during handling.
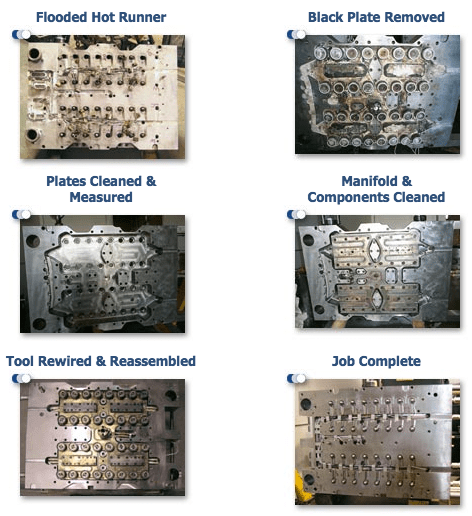
Step 6: Component Cleaning
Choose Appropriate Cleaning Methods: Select cleaning techniques compatible with the materials and contamination levels of your components. Options include ultrasonic cleaning, pyrolysis, or manual methods using specialized solvents.
Clean Melt Channels and Nozzle Bores: Ensure all plastic residues and contaminants are thoroughly removed to prevent defects in future molding cycles.
Inspect for Wear and Damage: During cleaning, examine components for signs of wear, corrosion, or damage that may necessitate repair or replacement.
Step 7: Inspection and Documentation
Conduct Detailed Inspections: Utilize appropriate measurement tools to assess critical dimensions and tolerances of each component.
Document Findings: Record all observations, measurements, and any anomalies detected. This documentation serves as a valuable reference for reassembly and future maintenance.
Evaluate Component Condition: Decide whether components are suitable for reuse or require refurbishment or replacement based on inspection results.
Step 8: Storage and Organization
Maintain a Clean Environment: Ensure the storage area is free from contaminants that could compromise component integrity.
Organize Components: Arrange cleaned and inspected parts systematically, labeling them to correspond with their positions in the assembly.
Sensitive Part Storage: Store delicate components, such as valve pins and nozzle tips, in protective cases to prevent damage.
By meticulously following these steps, maintenance personnel can perform effective hot runner disassembly on all systems, facilitating thorough cleaning, accurate inspection, and precise refurbishment. Adhering to best practices not only extends the lifespan of the system but also enhances molding quality and reduces downtime.
Polymer Cleaning Technology: Your Partner in Hot Runner Maintenance
Contact +1 (908) 281-0055 or [email protected] to discuss your Hot Runner Systems today! Experts in Hot Runner System Repair and General Maintenance.
With over 30 years of dedicated service, Polymer Cleaning Technology stands as one of the largest independent provider of parts, service, and repairs for all OEM hot runner systems. Our comprehensive suite of services includes:
Hot Runner Cleaning: Utilizing advanced cleaning technologies, we ensure complete removal of polymer and carbon deposits from manifolds and components, restoring optimal functionality.
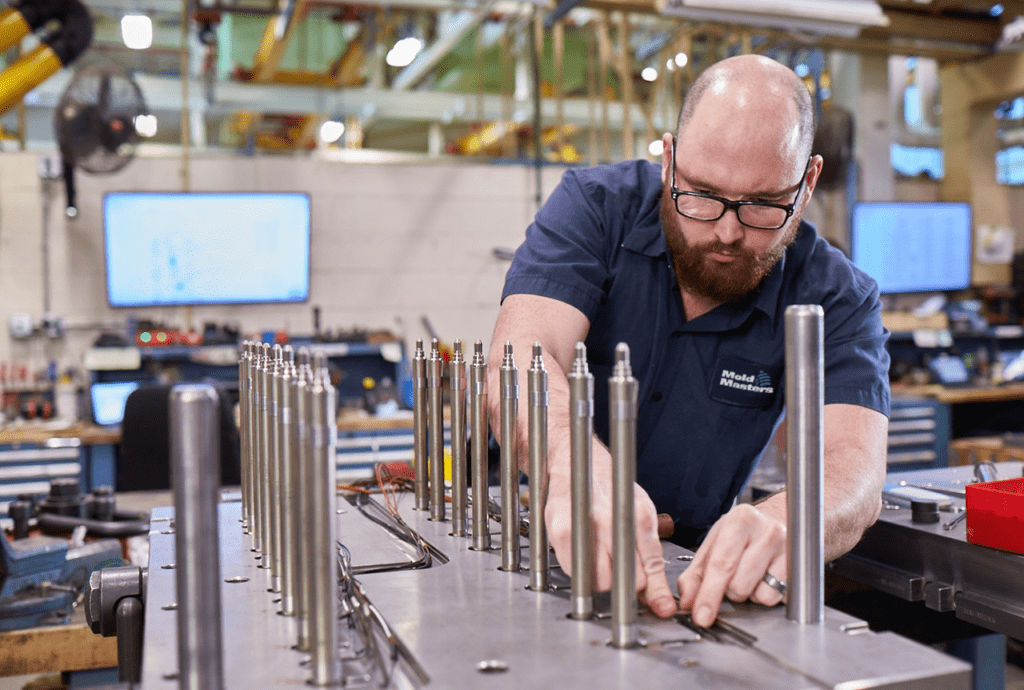
Inspection and Repair: Our skilled technicians conduct thorough inspections to identify and address wear or damage, ensuring each component meets stringent quality standards.
Refurbishment Programs: We offer tailored refurbishment solutions, including disassembly, cleaning, repair, and reassembly, backed by a one-year leak-proof guarantee on any brand of hot runner we refurbish.
Part Sales: PCT is one of the largest independent providers of spare parts for all brands of PET preform injection molding systems. We can provide a wide array of standard parts for: HUSKY, MANNER, MHT, MOLD-MASTERS, OTTO HOFSTETTER, MILACRON, HUAYAN, SACMI, SIPA, YUDO, and MORE!
Our global reach extends to over 60 countries, reflecting our commitment to delivering high-quality, competitively priced hot runner parts and services worldwide.
Hot Runner Maintenance and Custom Parts Production
Regular hot runner maintenance is essential to prolonging the lifespan of components and ensuring consistent production quality. Our team provides comprehensive maintenance services requiring effective and efficient hot runner disassembly, including preventative inspections, part cleaning, and refurbishment. Additionally, we manufacture custom hot runner parts to meet the unique specifications of your molding system. Find out more by contacting Polymer Cleaning Technology at (908) 281-0055 or [email protected]
By investing in routine maintenance and high-quality refurbishment, manufacturers can minimize downtime, reduce scrap rates, and optimize overall efficiency in plastic injection molding.
*This information is to be used as a general guideline only. Speak to your system manufacturer directly for verified information regarding your Hot Runner System.
For more in-depth insights into hot runner parts, visit us at www.PolymerCleaning.com, or give us a call at (908) 281-0055.
Find this information useful? Share with friends & colleagues:
Contact Information:
Polymer Cleaning Technology, Inc.
[email protected]
+1 (908) 281-0055